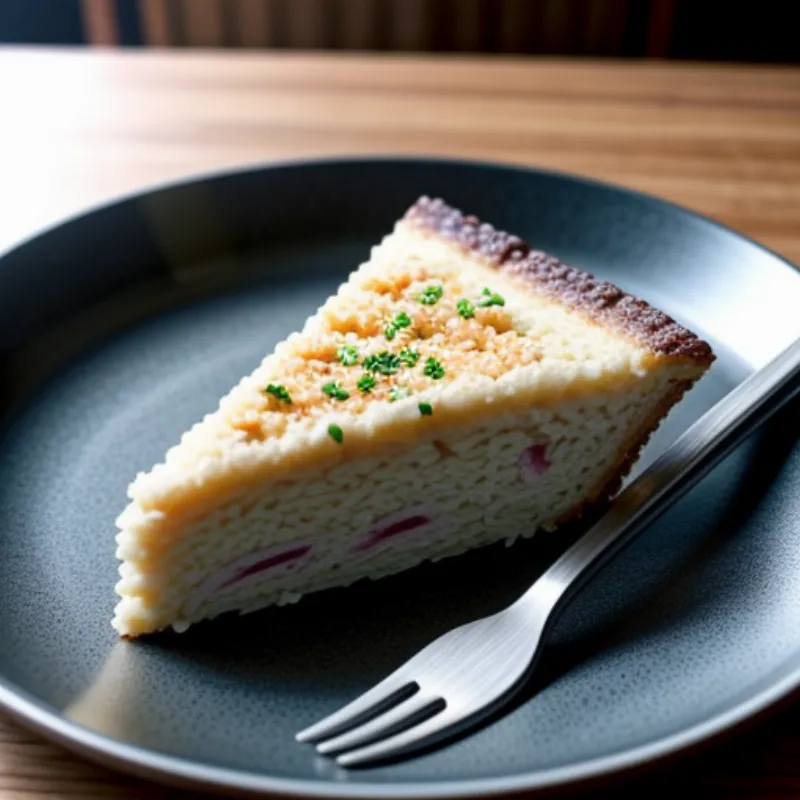
Rijsttaart, translating to “rice tart” in English, is a beloved Dutch custard pie that’s as comforting as a warm hug. Imagine a creamy, vanilla-infused rice pudding encased in a buttery, flaky crust. This dessert, often enjoyed during festive occasions and family gatherings in the Netherlands, will surely become a new favorite in your household. In this article, we’ll embark on a delightful culinary journey to recreate this traditional Dutch treat in your own kitchen.
Unveiling the Flavors of Rijsttaart
Rijsttaart’s appeal lies in its simplicity and heart-warming flavors. The base of the tart is a rich, slow-cooked rice pudding, infused with fragrant vanilla and a hint of lemon zest. This luscious filling is then poured into a crisp, buttery crust, creating a delightful contrast of textures.
“My fondest memories of rijsttaart are from my childhood,” shares renowned pastry chef, Anya Janssen, “My grandmother would always bake it for special occasions, and the aroma of vanilla and cinnamon wafting through the house would instantly transport me to a place of pure joy.”
Ingredients: A Symphony of Flavors
For the Crust:
- 1 ¼ cups (150g) all-purpose flour
- ½ teaspoon salt
- ½ cup (115g) unsalted butter, cold and cubed
- ⅓ cup (80ml) ice water
For the Filling:
- 1 cup (185g) long grain rice, rinsed
- 4 cups (950ml) whole milk
- 1 cup (200g) granulated sugar
- 1 vanilla bean, split and scraped (or 2 teaspoons vanilla extract)
- Zest of 1 lemon
- 2 large eggs
- 2 tablespoons cornstarch
Tools of the Trade
- 9-inch pie dish
- Medium saucepan
- Whisk
- Rubber spatula
- Mixing bowls
- Parchment paper
- Pie weights or dried beans
Baking the Perfect Rijsttaart: A Step-by-Step Guide
1. Crafting the Buttery Crust
- In a large bowl, whisk together the flour and salt.
- Add the cold cubed butter and work it into the flour using your fingers or a pastry cutter until the mixture resembles coarse crumbs.
- Gradually add the ice water, a tablespoon at a time, mixing until the dough just comes together. Do not overwork the dough.
- Shape the dough into a disc, wrap it in plastic wrap, and refrigerate for at least 30 minutes.
2. Creating the Creamy Rice Filling
- In a medium saucepan, combine the rinsed rice, milk, sugar, vanilla bean and seeds (or extract), and lemon zest.
- Bring the mixture to a boil over medium heat, then reduce heat to low and simmer, uncovered, for about 45 minutes to an hour, or until the rice is very tender and the mixture has thickened. Stir frequently to prevent sticking.
- In a small bowl, whisk together the eggs and cornstarch until smooth.
- Temper the egg mixture by gradually whisking in a few spoonfuls of the hot rice mixture.
- Pour the tempered egg mixture back into the saucepan with the rice.
- Cook for an additional 2-3 minutes, or until the filling is thick and bubbly, stirring constantly.
- Remove from heat and discard the vanilla bean, if using.
3. Assembling and Baking the Rijsttaart
- Preheat oven to 350°F (175°C).
- Roll out the chilled dough on a lightly floured surface to a 12-inch circle.
- Carefully transfer the dough to the pie dish and gently press it into the bottom and sides. Trim and crimp the edges.
- Line the crust with parchment paper and fill it with pie weights or dried beans.
- Blind bake the crust for 15 minutes.
- Remove the parchment paper and weights, then bake for an additional 5-7 minutes, or until the crust is lightly golden.
- Pour the hot rice filling into the pre-baked crust.
- Bake for 20-25 minutes, or until the filling is set and slightly puffed around the edges.
4. Cooling and Serving the Dutch Delight
- Let the rijsttaart cool completely at room temperature before serving. This will allow the filling to set properly.
 Rijsttaart Slice
Tips for a Perfect Rijsttaart: Insights from the Kitchen
- Rice Selection: While long grain rice is traditional, you can experiment with Arborio rice for a creamier texture.
- Vanilla Enhancement: For a more pronounced vanilla flavor, use a vanilla bean instead of extract. Scrape the seeds into the milk for an extra burst of aroma.
- Preventing Soggy Crust: Blind baking the crust ensures a crispy base. Don’t skip this step!
- Cooling Time: Allow ample cooling time for the filling to set. Rushing this step can result in a runny center.
FAQs: Addressing Common Queries
Q: Can I make rijsttaart ahead of time?
A: Absolutely! Rijsttaart can be made a day ahead and stored in the refrigerator.
Q: What can I serve with rijsttaart?
A: This Dutch treat is delicious on its own, but a dollop of whipped cream or a drizzle of fruit sauce can elevate the flavor.
 Rijsttaart on Table
Conclusion: Embrace the Dutch Tradition
Rijsttaart is more than just a dessert; it’s an experience. With its comforting flavors and nostalgic charm, this Dutch delicacy is sure to become a household favorite. Gather your ingredients, put on your apron, and embark on a culinary journey to the Netherlands by creating this delightful treat in your own kitchen. Don’t forget to share your baking triumphs with us in the comments below!
